Confluence Cloud Configuration
Setup Confluence Cloud
The connector uses a regular user to index content. There are two options for authentication of that user.
OAuth2 is the Atlassian-recommended method of authentication where an application acts on behalf of a user with limited permissions.
The API token is an application-bound high complexity password. The connector logs in as that user and has all privileges of the user.
OAuth2 app
The configuration with OAuth2 is a two step process. First you need to register the OAuth app and then you need to give that app permission to act on behalf of the technical user.
App registry
-
Access the Atlassian Developer platform as the technical user.
-
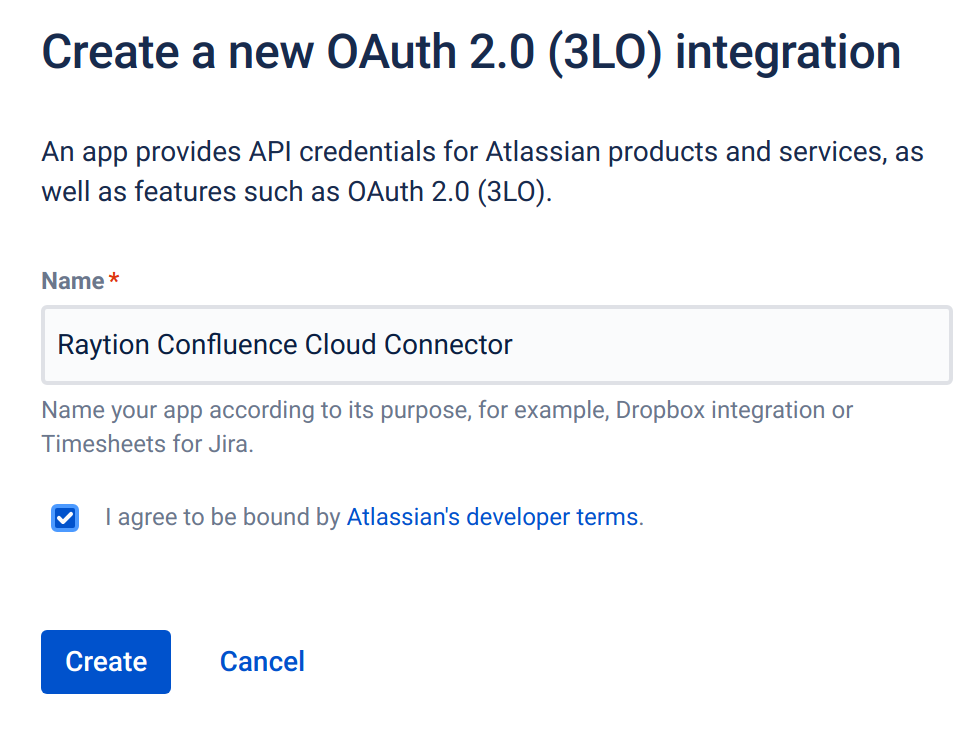
Click on "Create" and then "OAuth 2.0 integration".

-
Select a descriptive name and click "Create". This name will be displayed as part of the authorization dialogue.
-
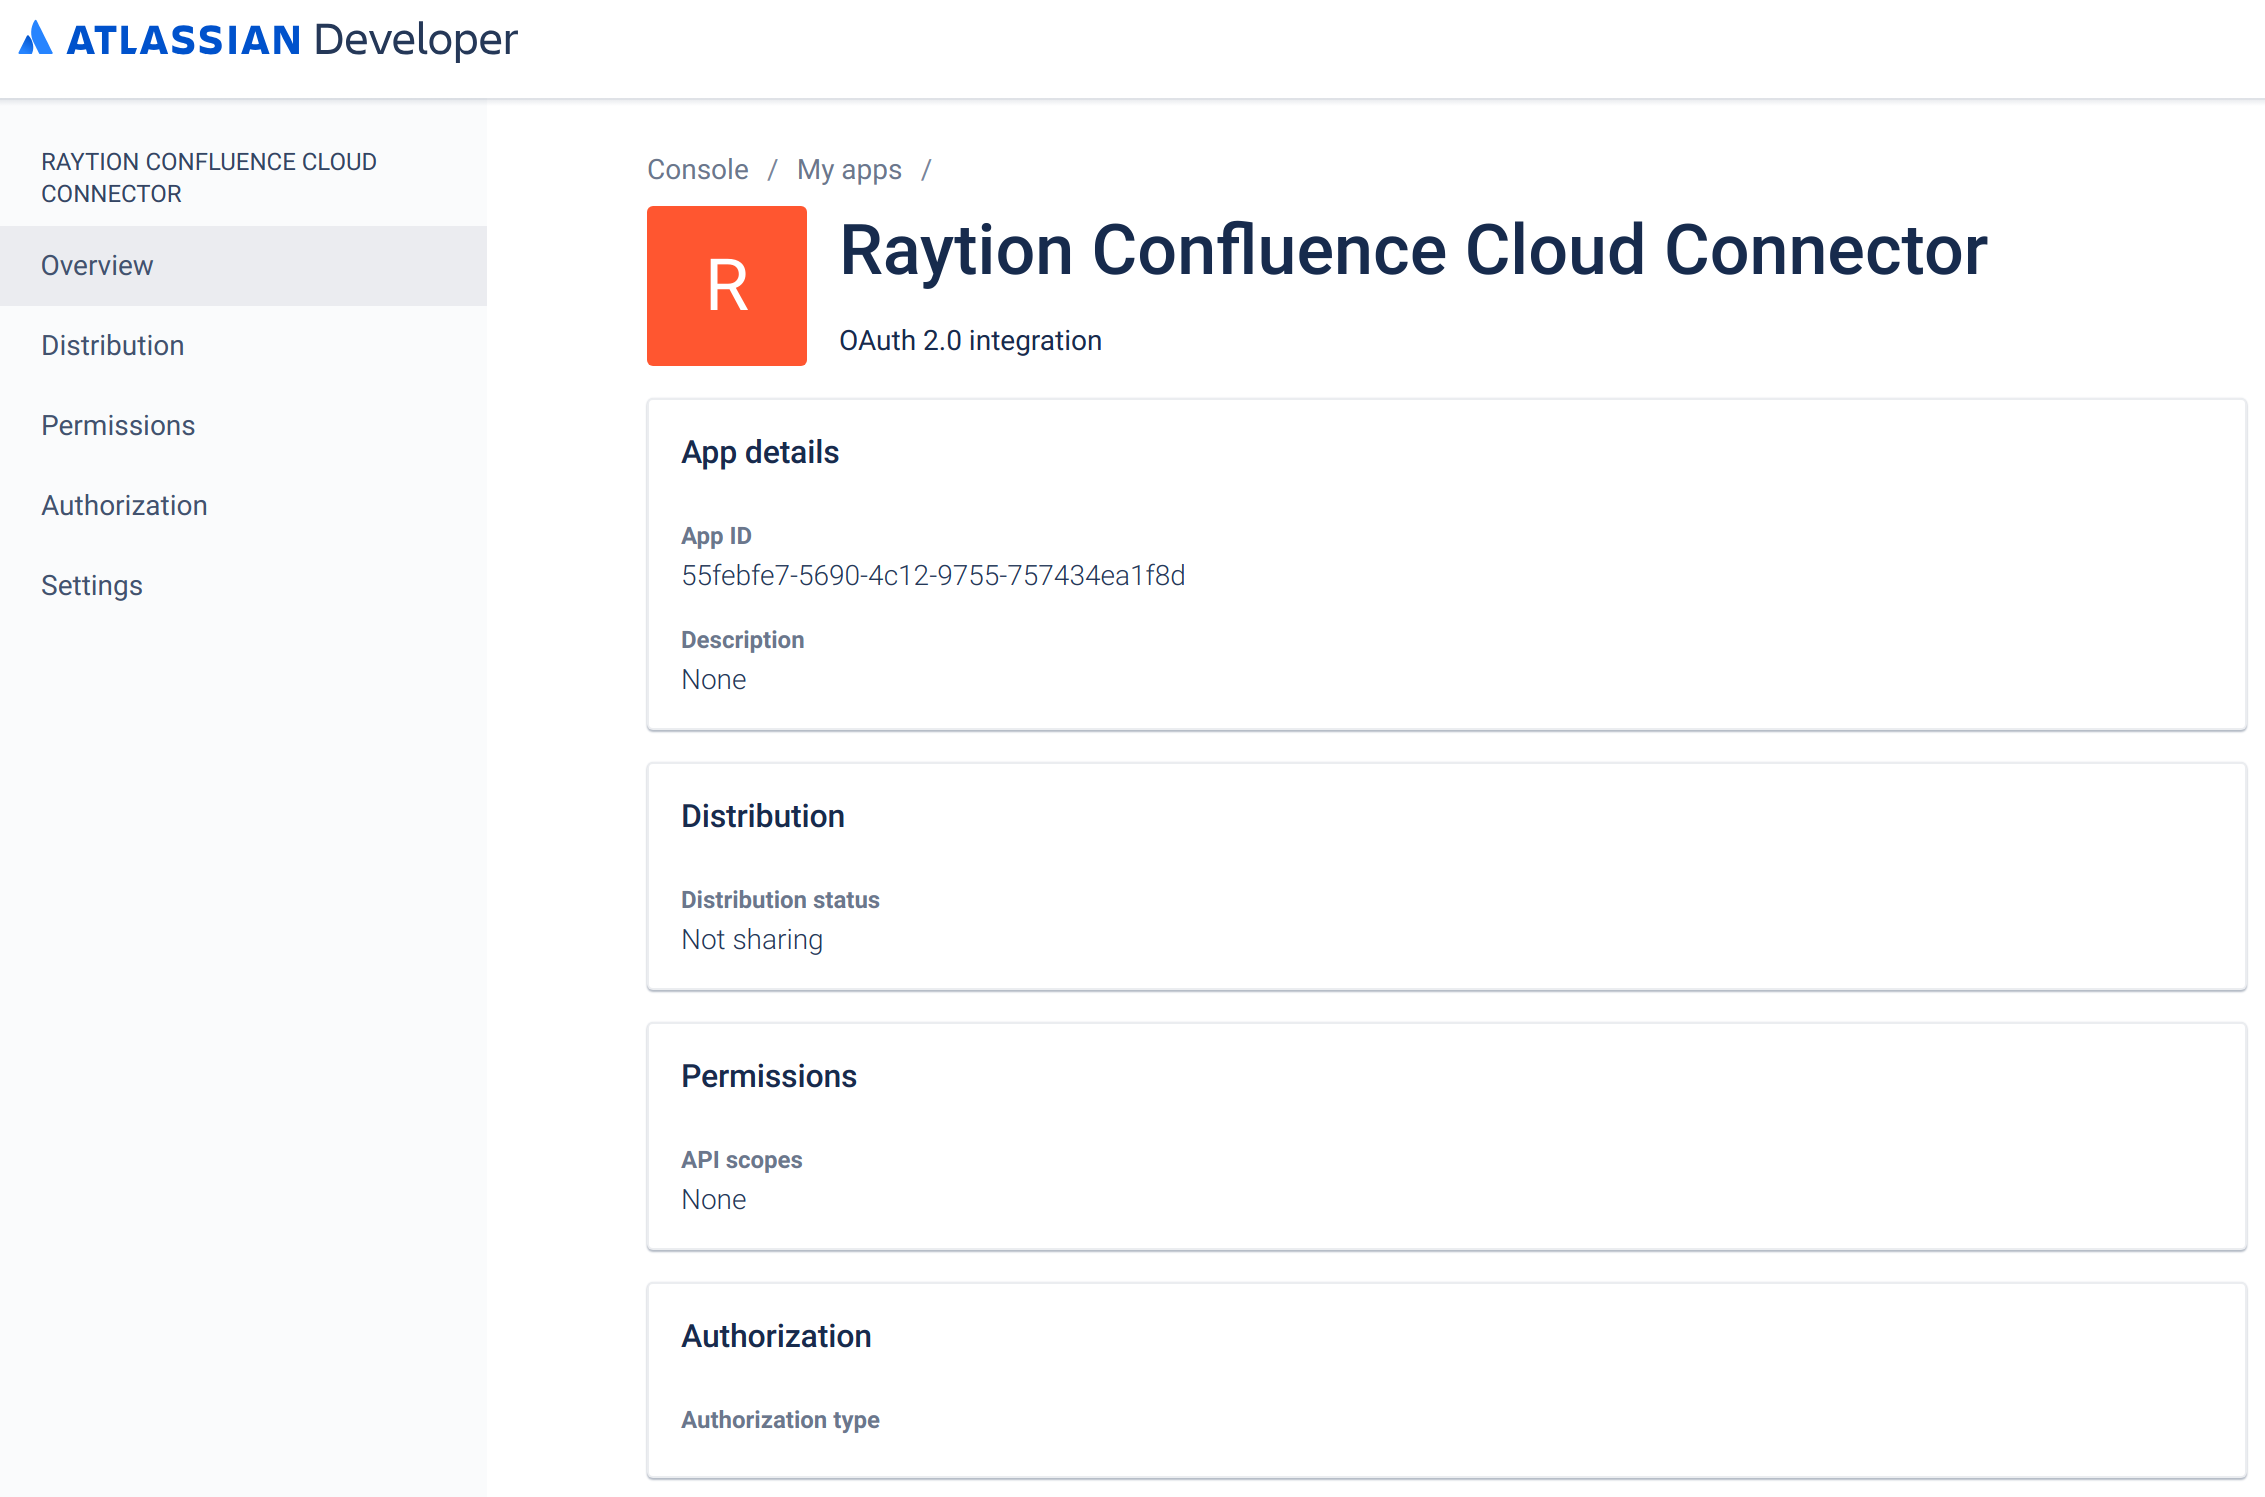
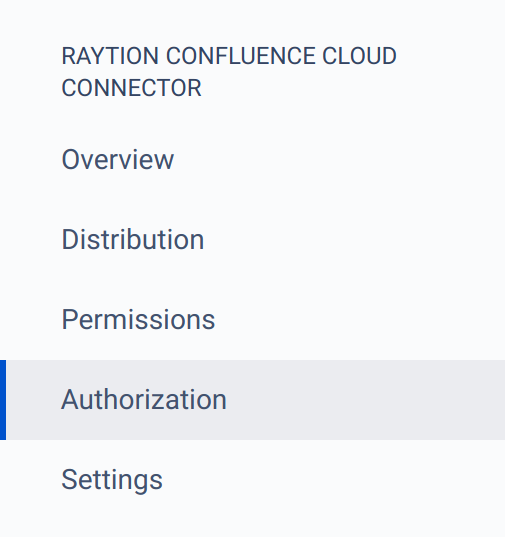
You will be redirected to the app overview. Click on "Permissions" in the left sidebar.
-
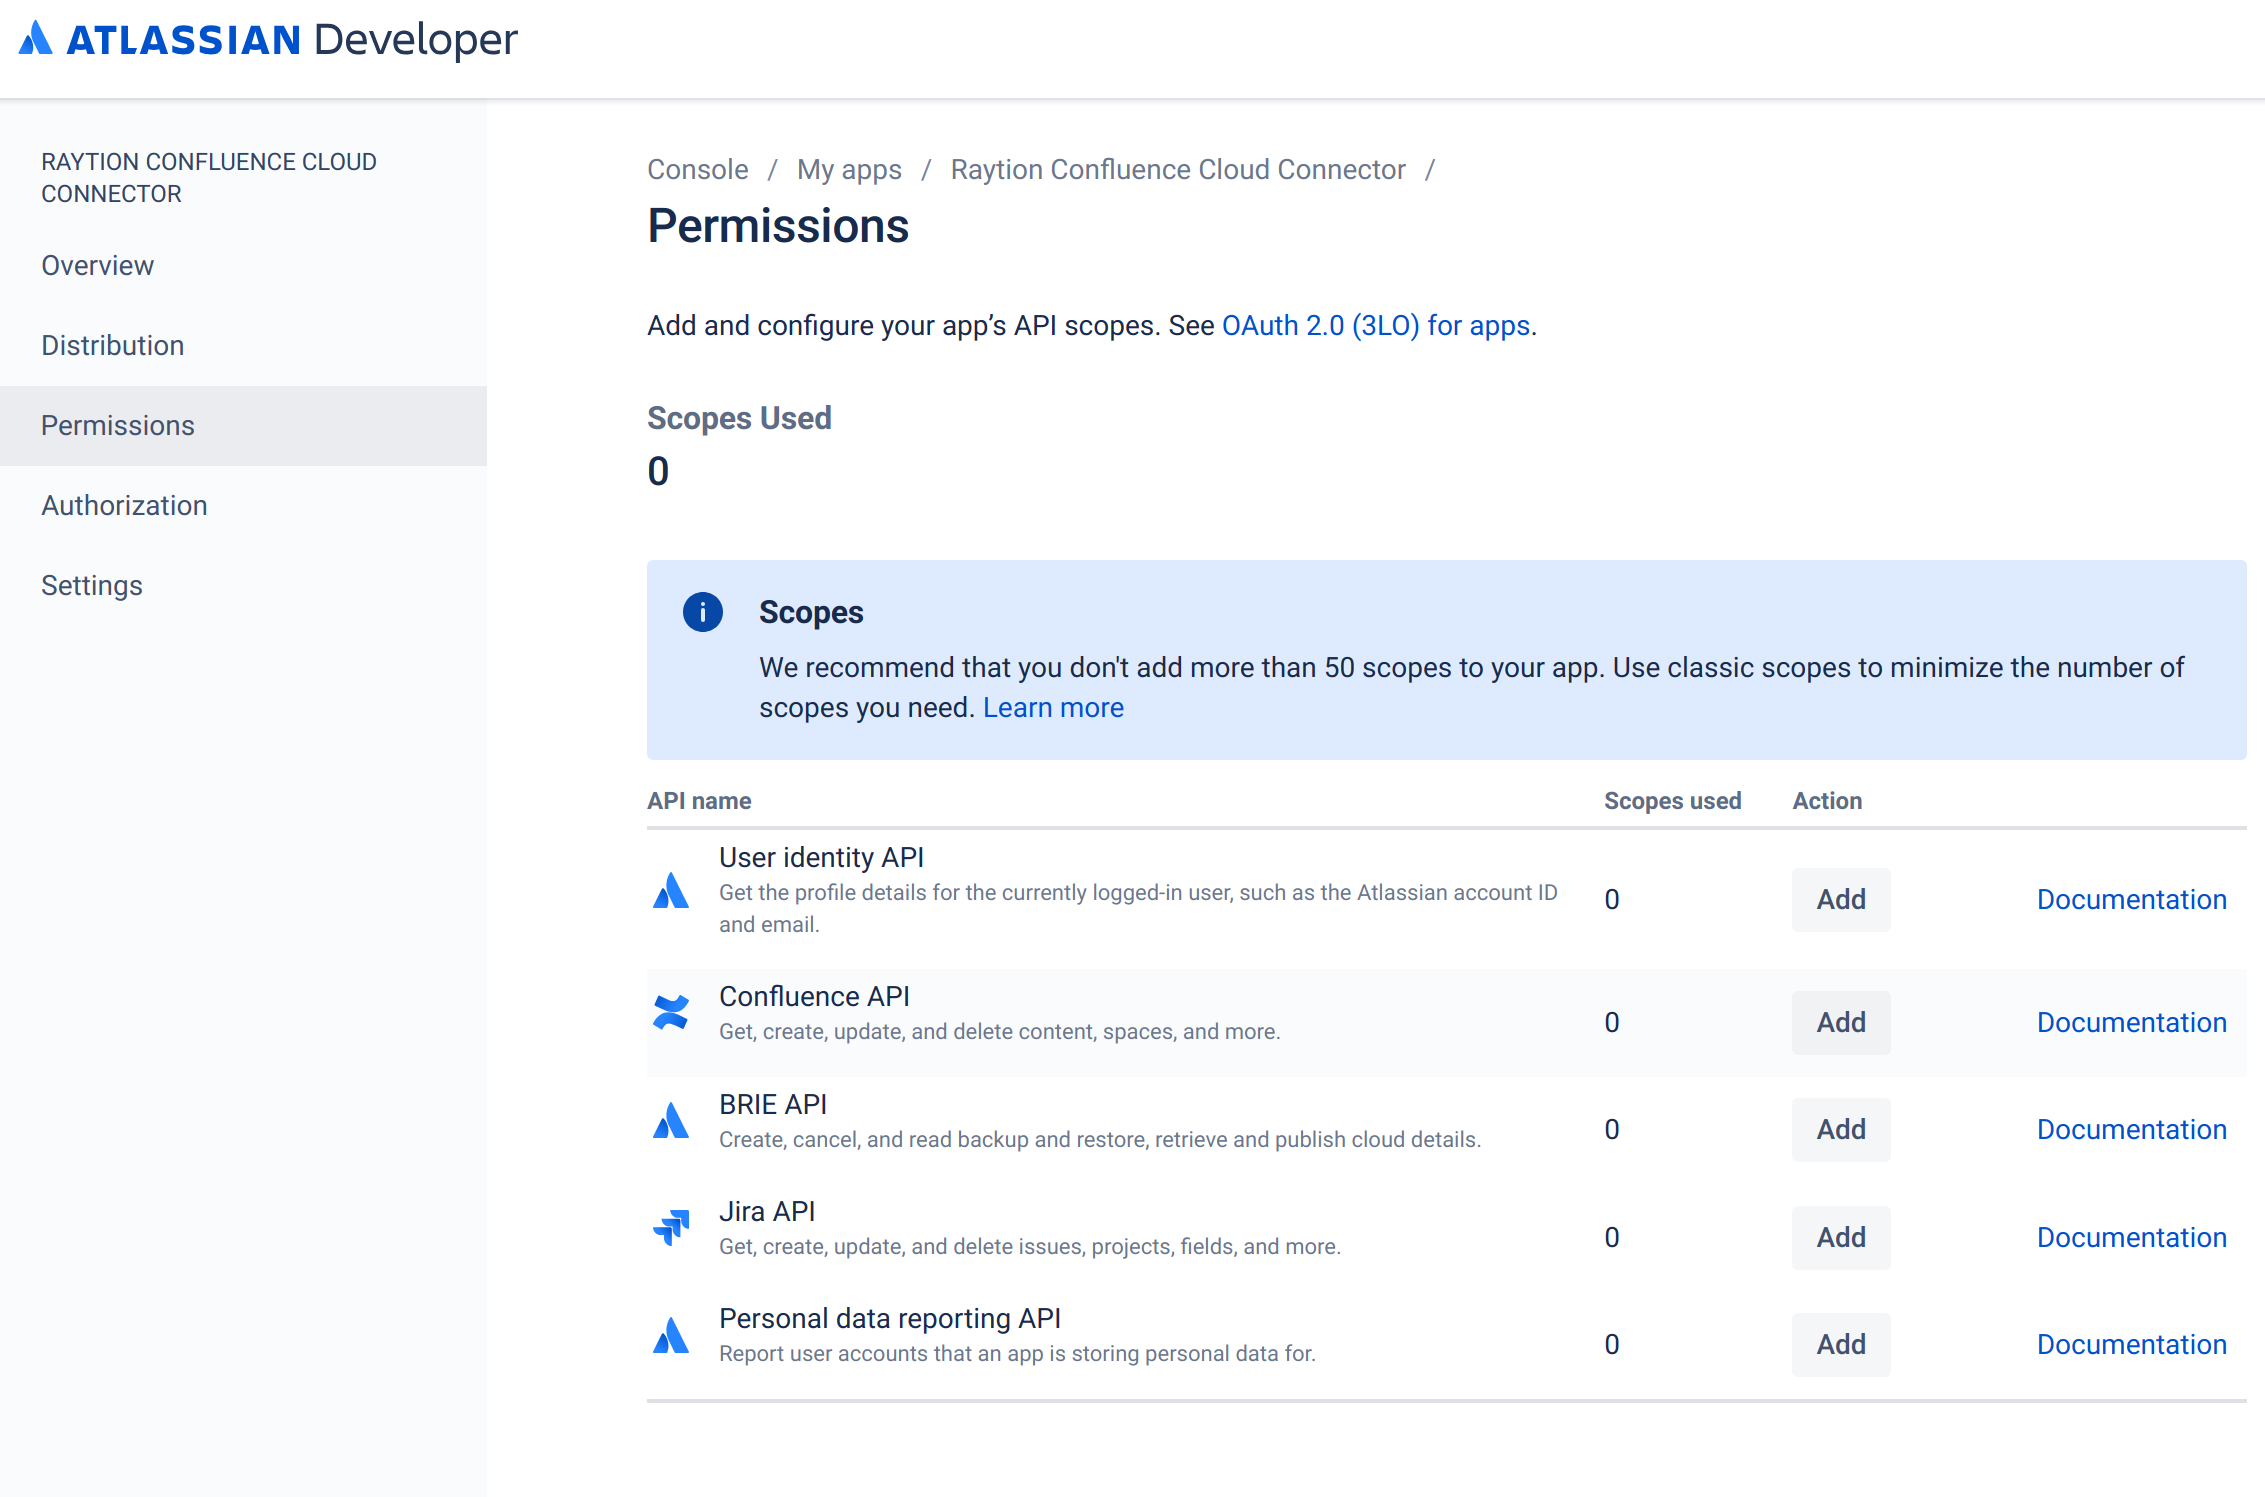
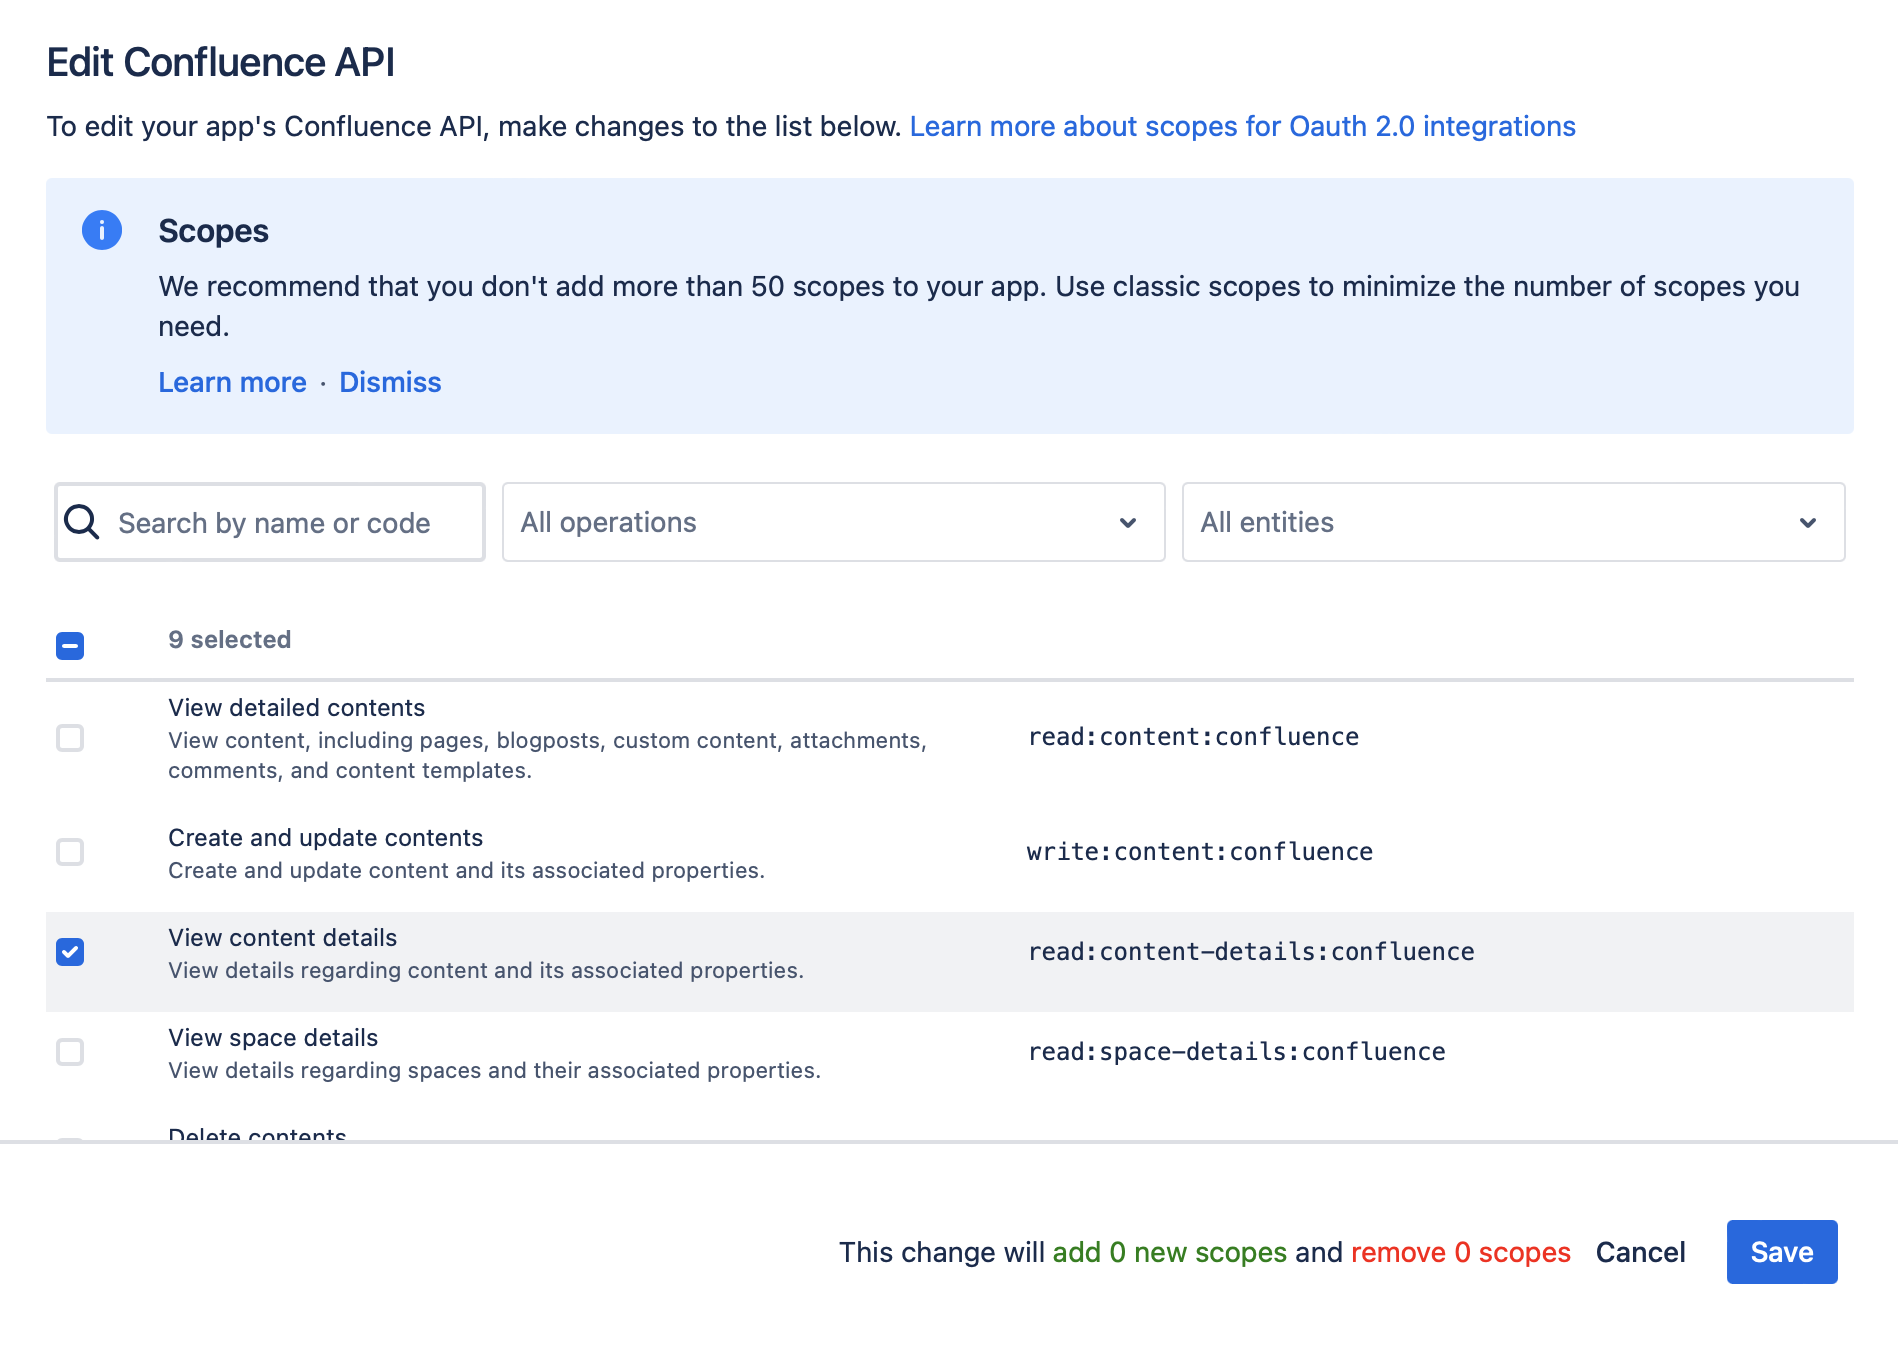
In the middle pane, for the API "Confluence API", click "Add".
-
The button will change its label to "Config…". Click it again.

-
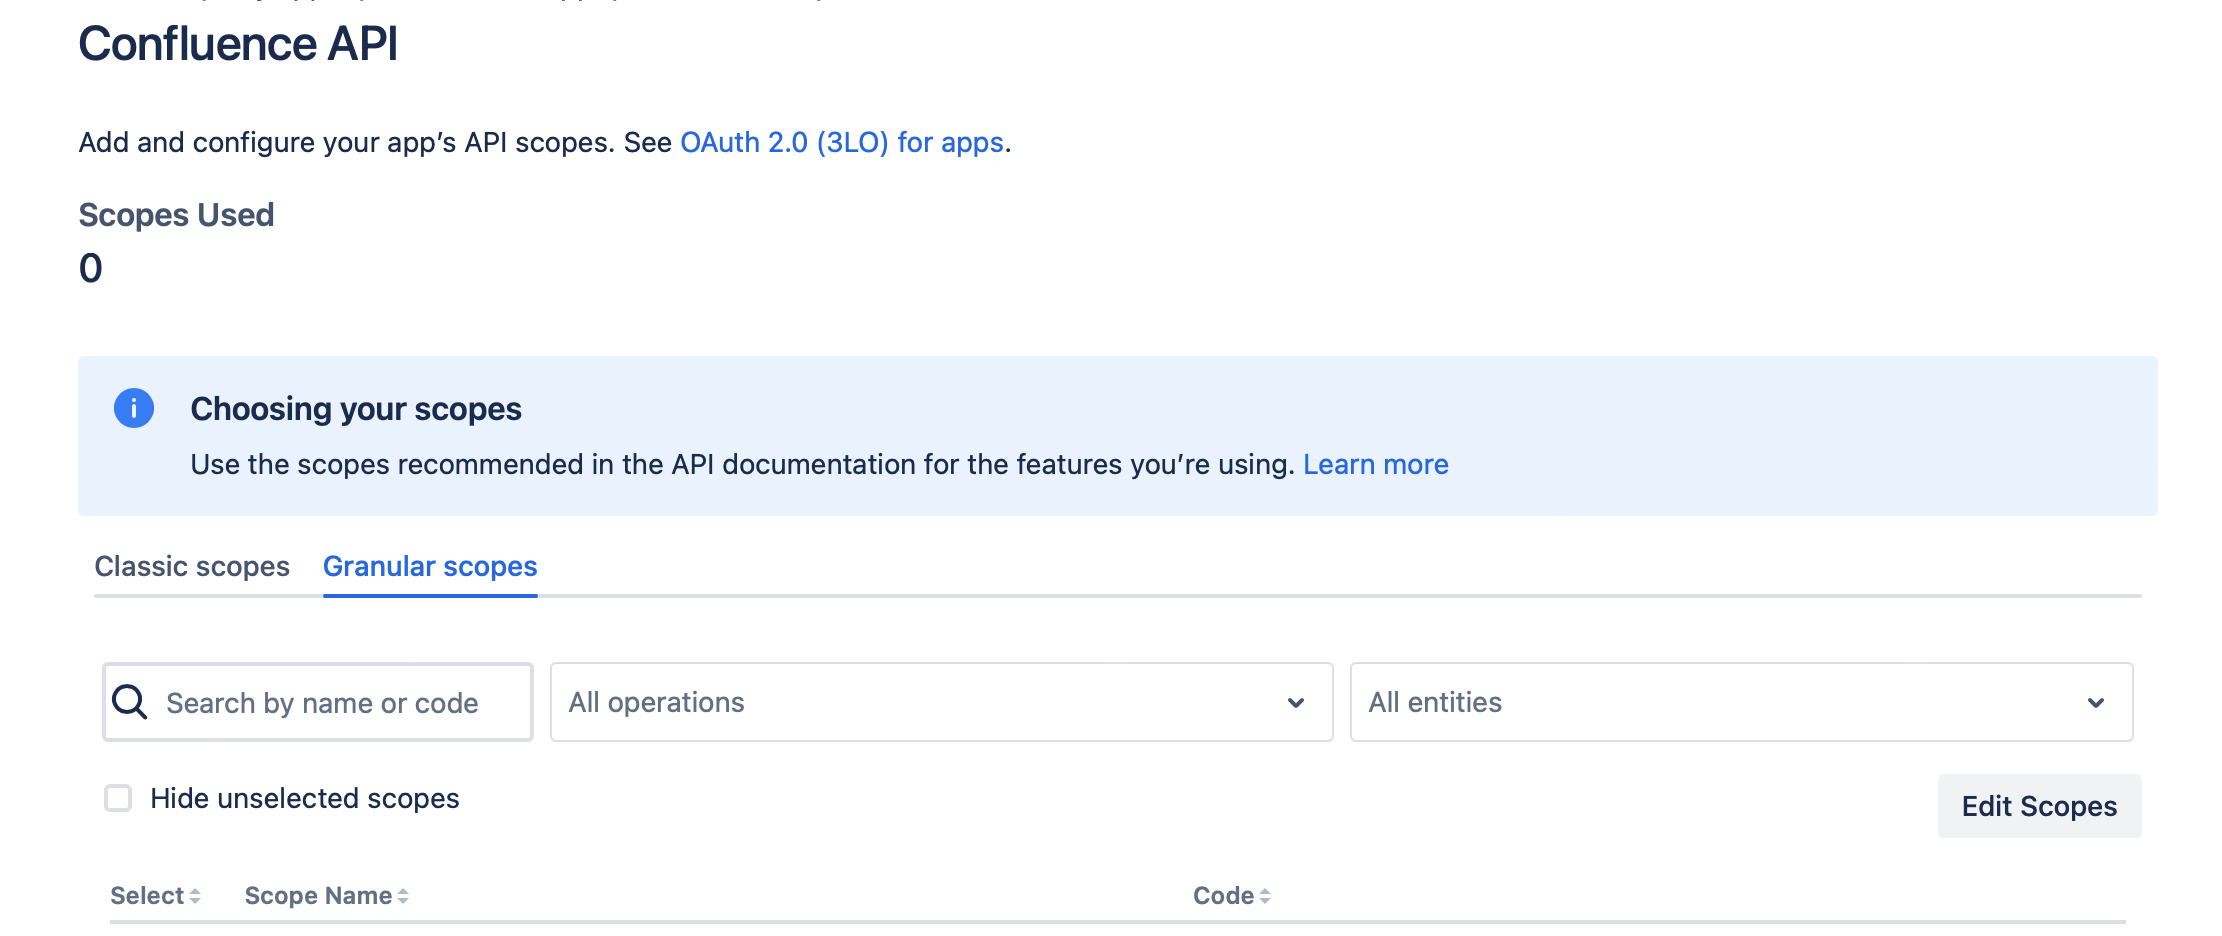
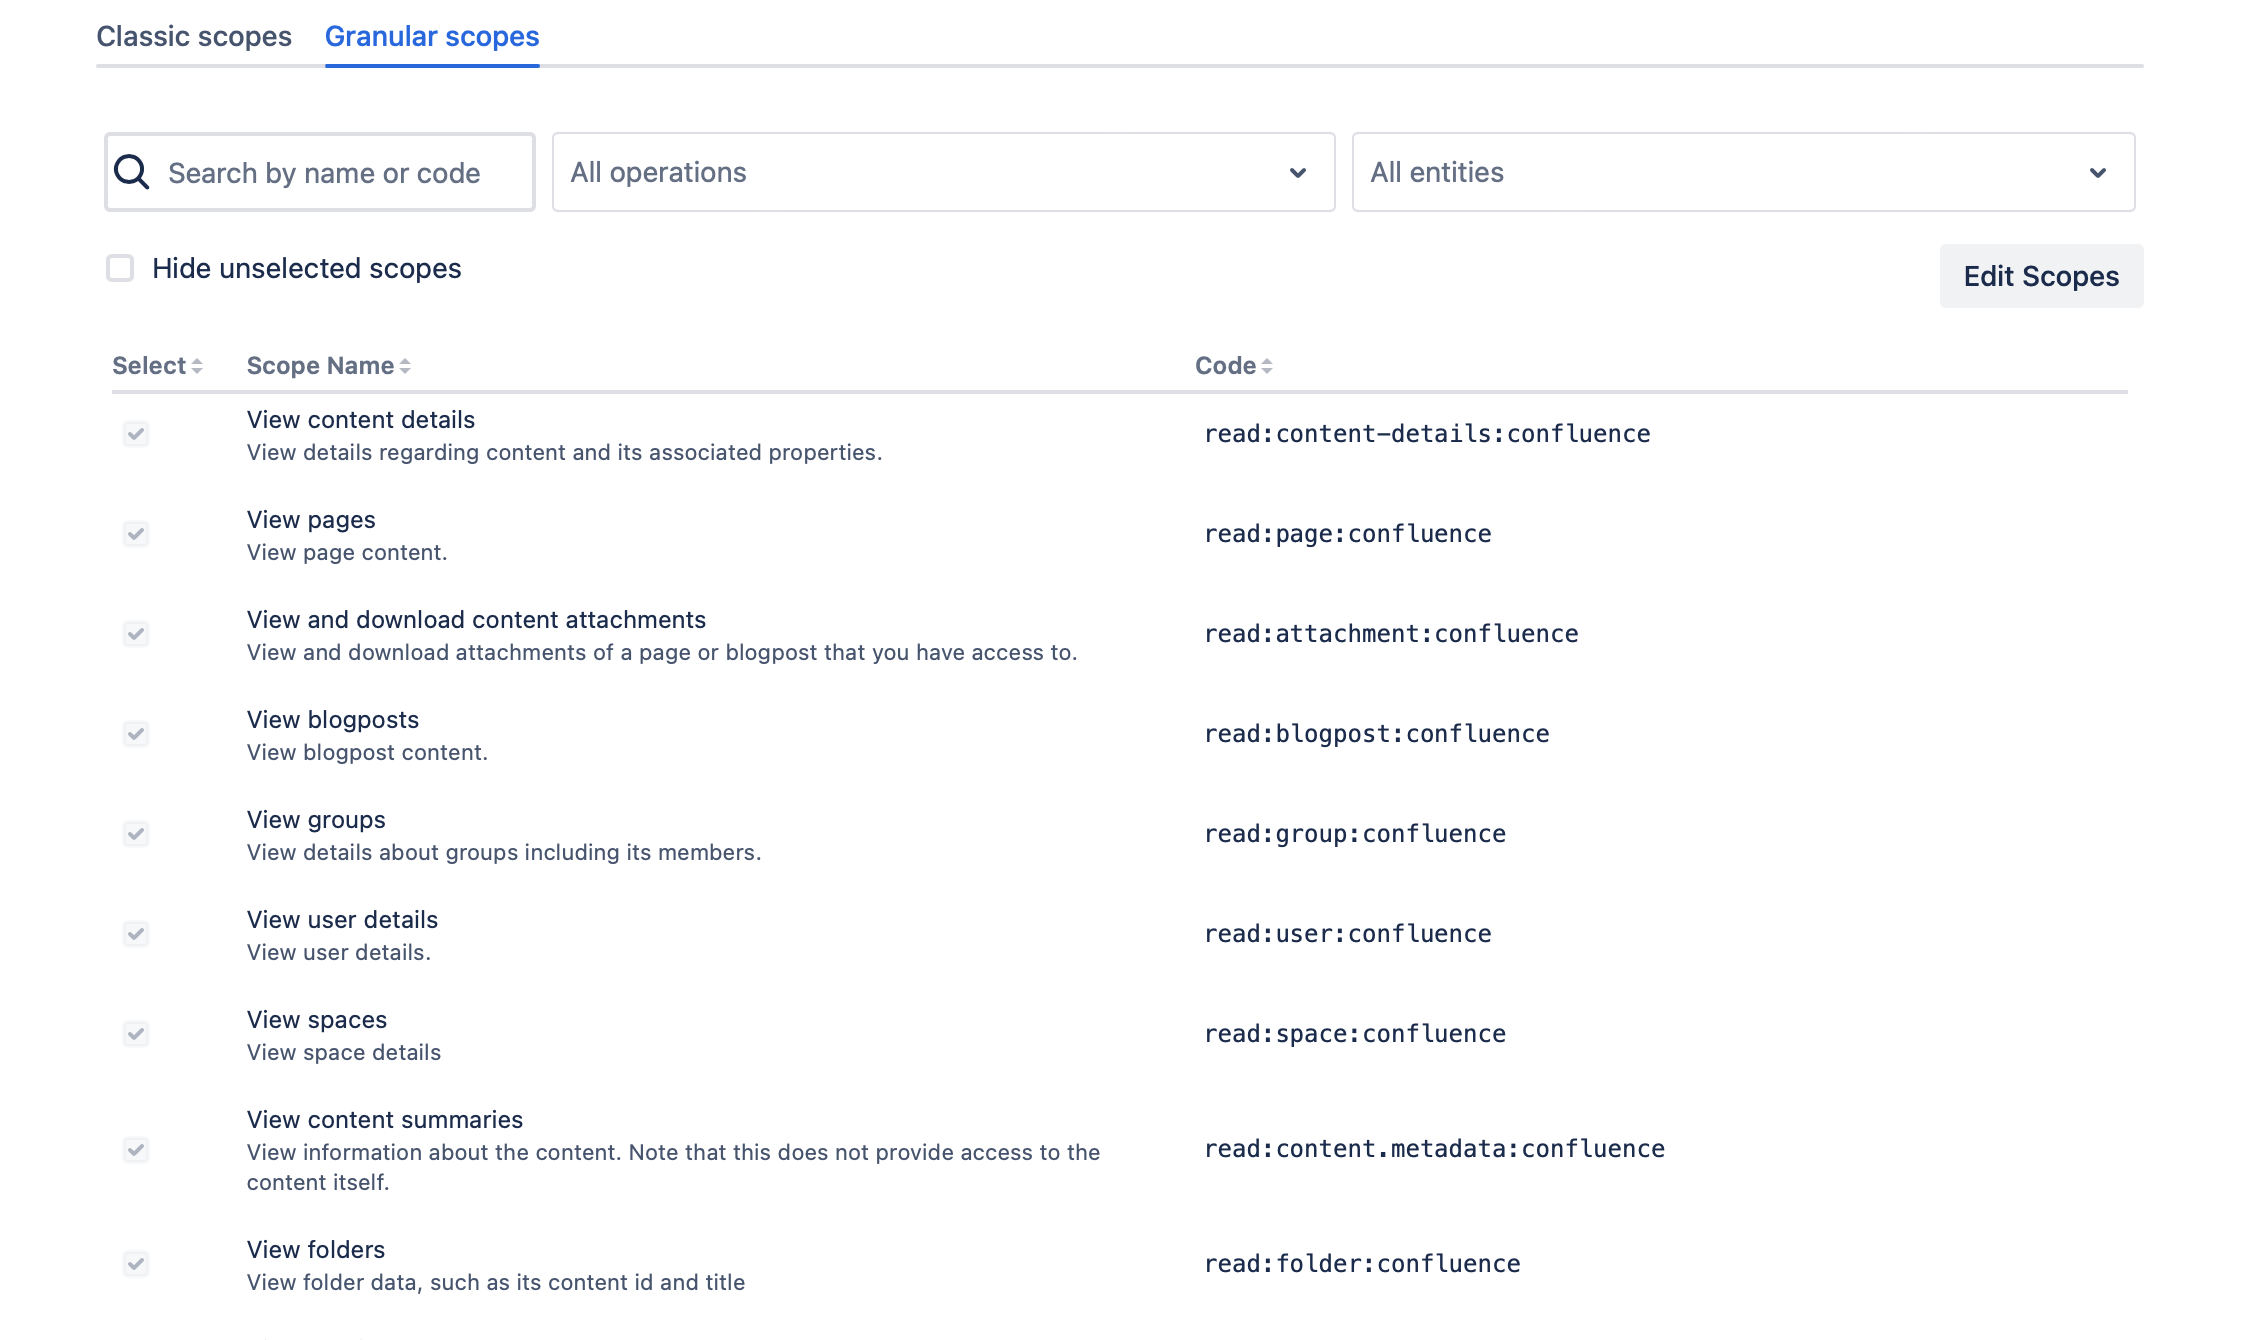
Choose the tab "Granular Scopes" and click the "Edit Scopes" button.
-
Add the following scopes:
-
read:space:confluence
-
read:attachment:confluence
-
read:blogpost:confluence
-
read:page:confluence
-
read:folder:confluence
-
read:content-details:confluence
-
read:content.metadata:confluence
-
read:group:confluence
-
read:user:confluence
-
-
Click on "Save"
-
These should be the resulting scopes
-
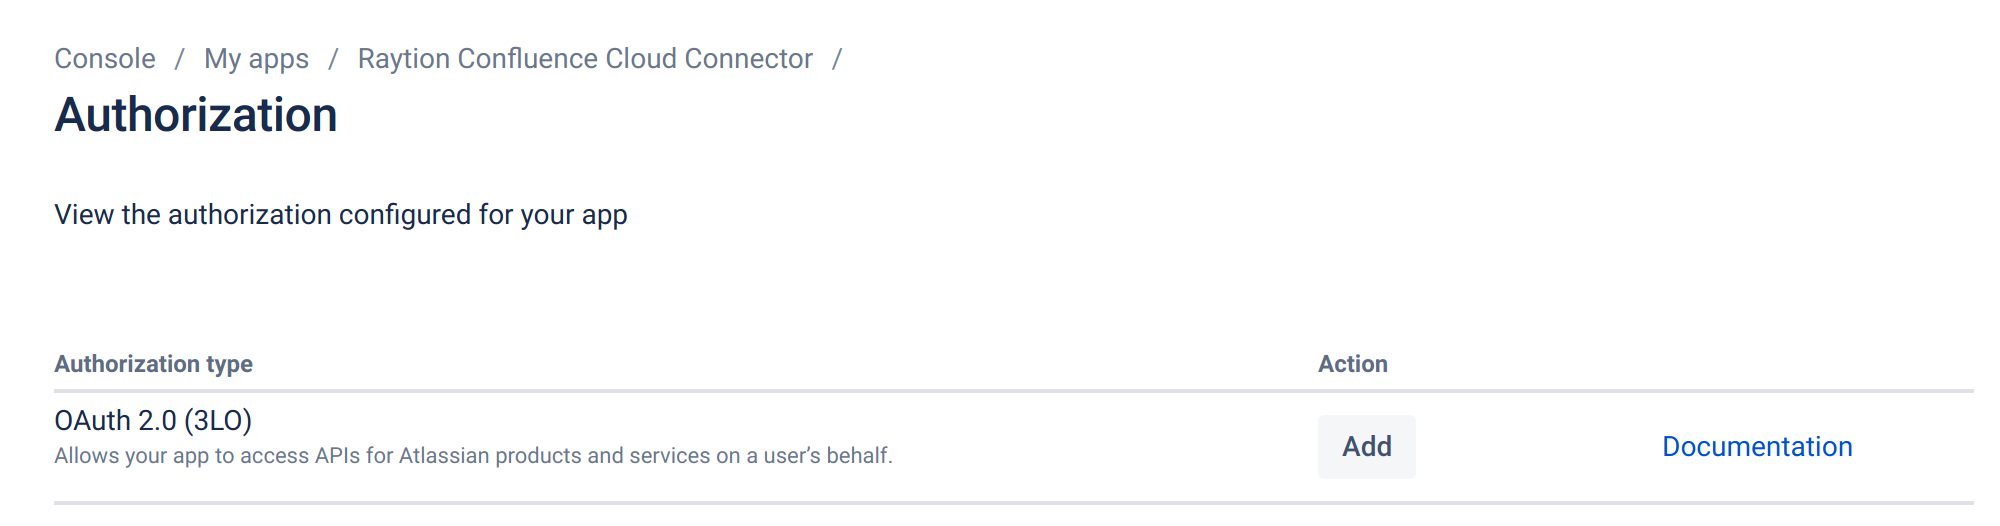
On the left panel, click on "Authorization"
-
For authorization type "OAuth 2.0 (3LO)", click "Add"
-
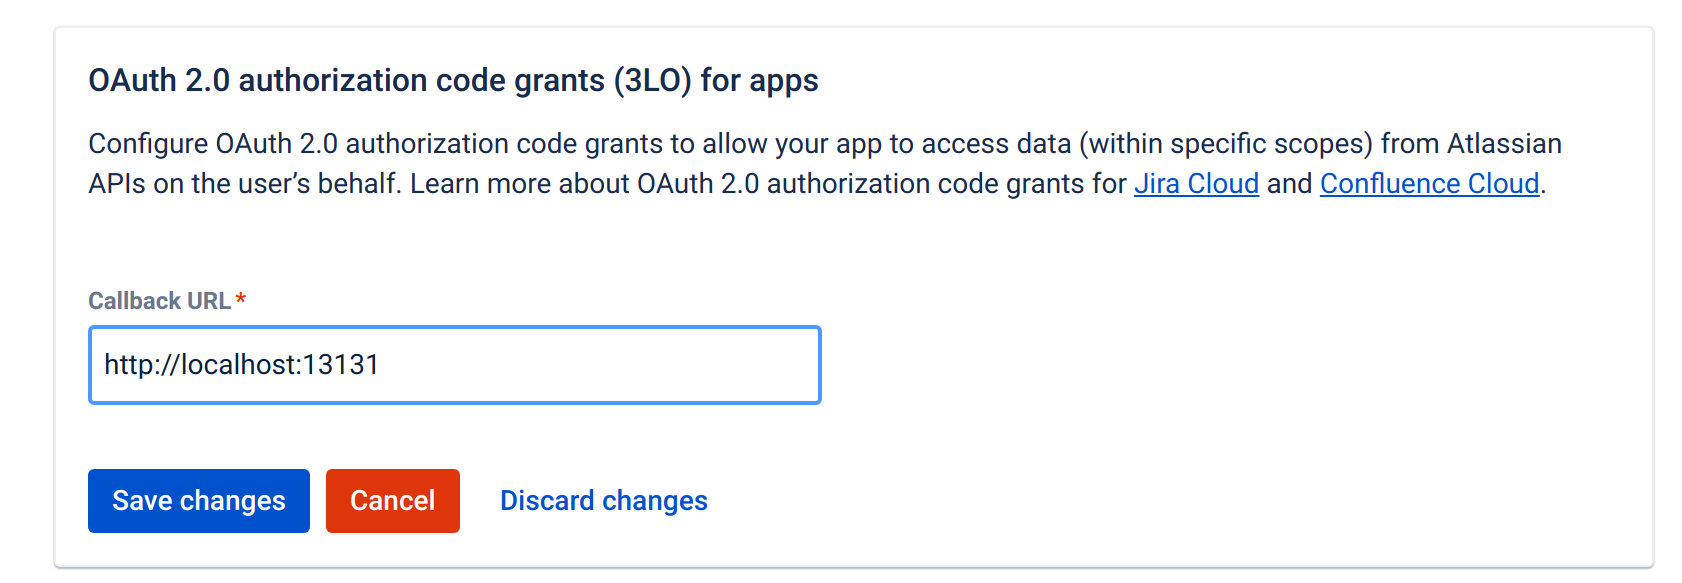
Set the Callback URL to "http://localhost:13131". A different port can be used but then the authorization steps have to be adjusted.
-
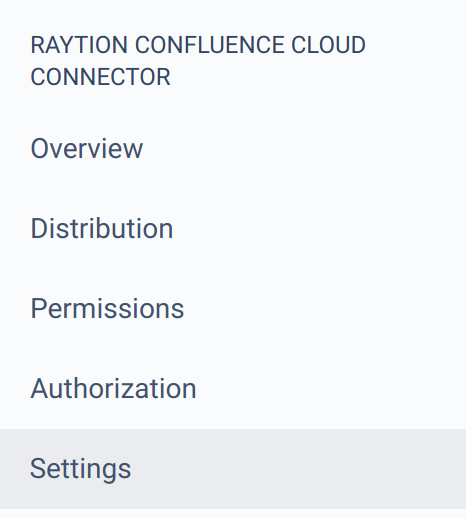
On the left panel, click on "Settings"
-
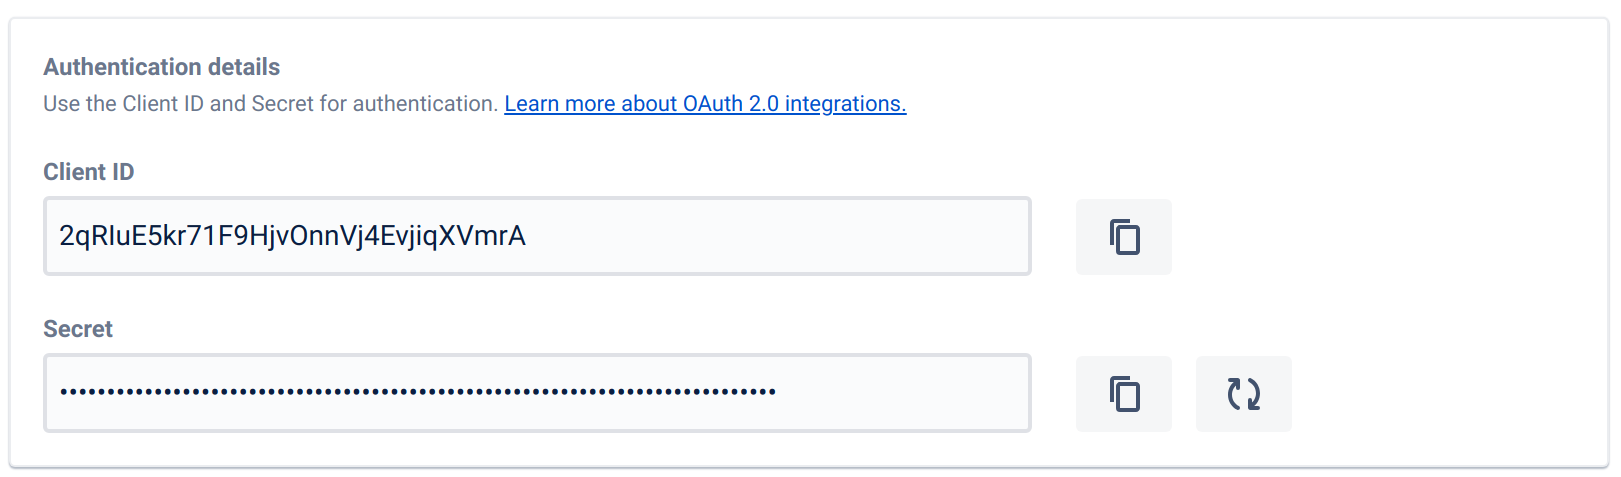
In the section "Authentication details", copy the "Client ID" and the "Secret". You will need them for both the authorization step and the connector configuration.
User authorization
-
Navigate to the OAuth2 token fetcher tool, that is located inside the connector installation directory.
<INST_DIR>/tools/oauth2-tokenfetcher-<version>. -
Start a commandline interface (Bash, PowerShell, Cmd, Terminal)
-
Execute the following command, using the application id and secret from before:
bin\oauth2-tokenfetcher(.bat) --api confluencecloud -i <CLIENT_ID> -s <SECRET> -
The tool will now try to open a web browser and direct it to the OAuth2 login page of Atlassian.
- NOTE
-
If the tool cannot open a browser, it will display a URL which you then have to copy into browser yourself. If the installation server of the connector has no browser capabilities, you will have to copy the whole folder
oauth2-tokenfetcher-<version>to a computer which has them and continue from there.
-
Log into the account that created the app
-
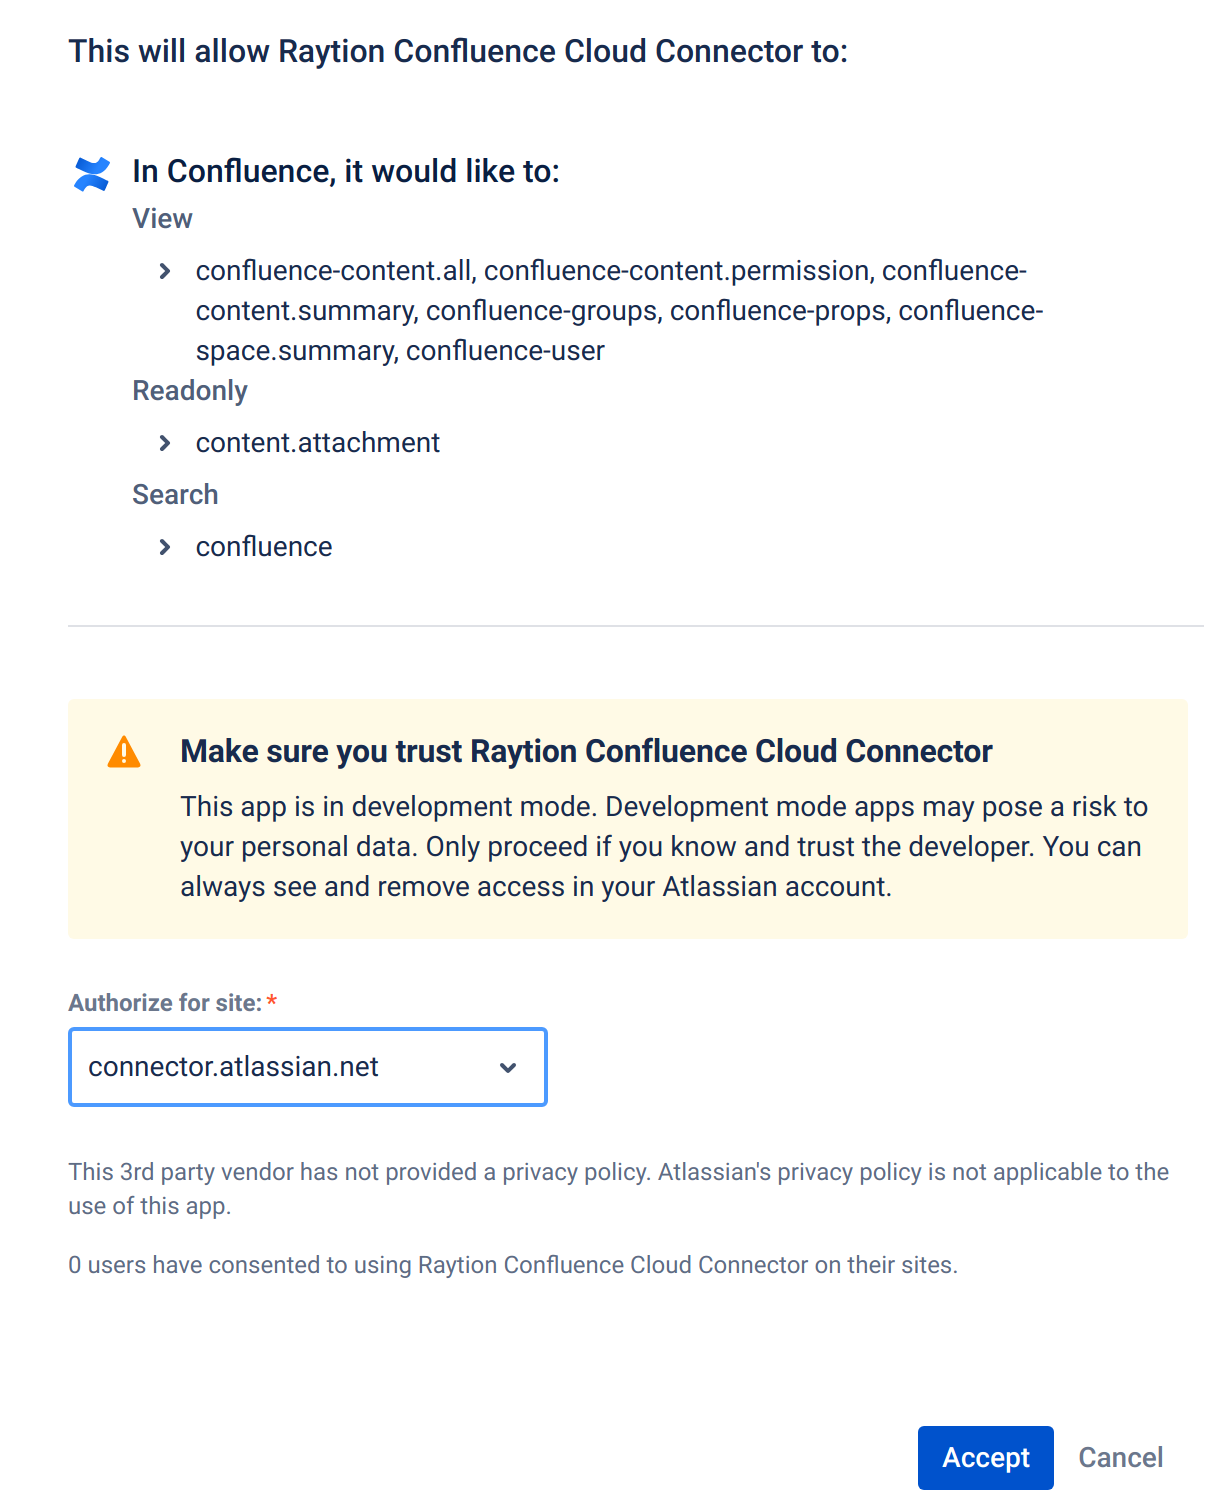
Review the requested scopes
-
In "Authorize for site:" select the correct target tenant and click on "Accept"
-
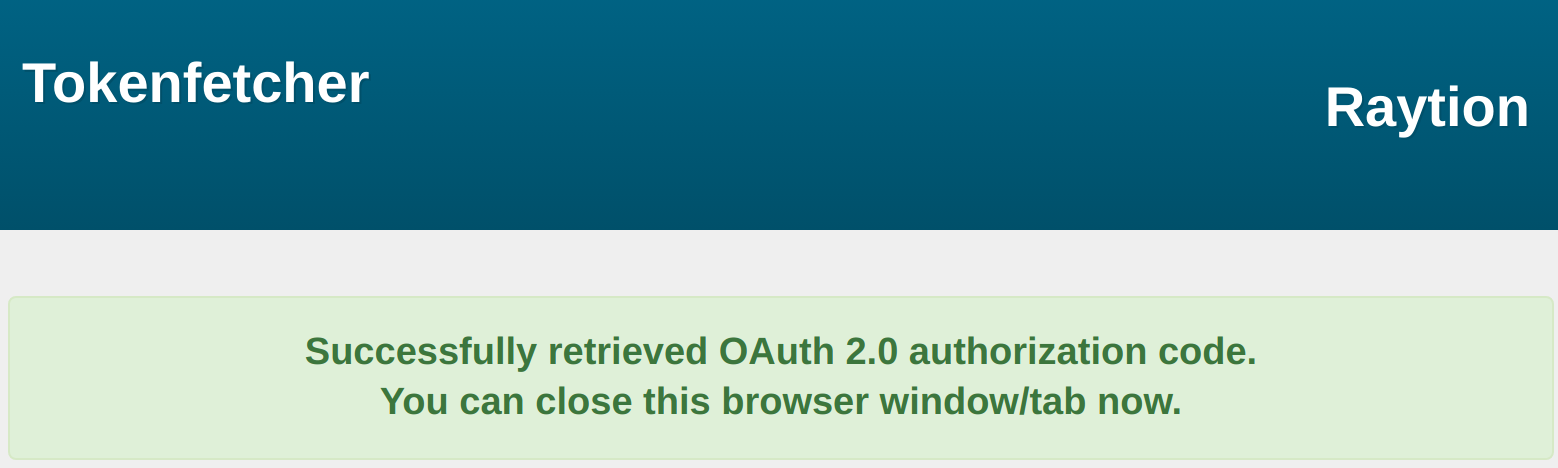
The tool will notify you about successfully retrieving the OAuth 2.0 token.
-
Return to the commandline interface. The tool has now completed and displays an access and a refresh token.
-
Copy the refresh token.
You will need the client id, client secret and this refresh token during the configuration of the connector.
- NOTE
-
The Atlassian API regularly invalidates the refresh token. If the connector has to be reconfigured or does not synchronize the token for more than 30 days, a new refresh token has to be obtained.
API token
-
Log into your Atlassian instance using your technical account. The generated API token enables the connector to read all documents that the technical account has access to. Therefore, the technical account must have access to all documents, which should be crawled.
-
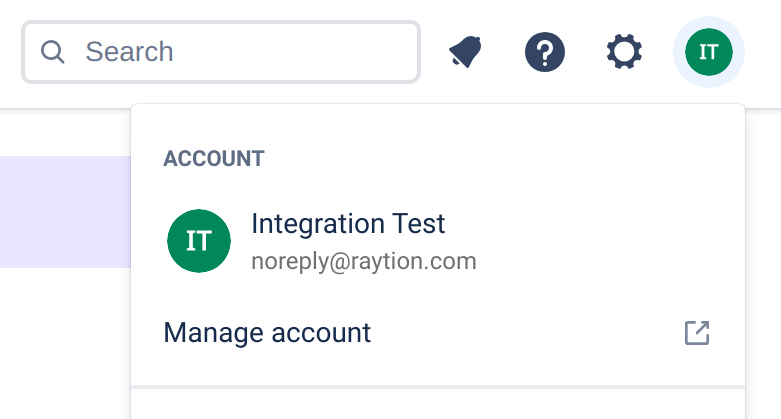
In the top right, click on your profile picture
-
Click on "Manage Account"
-
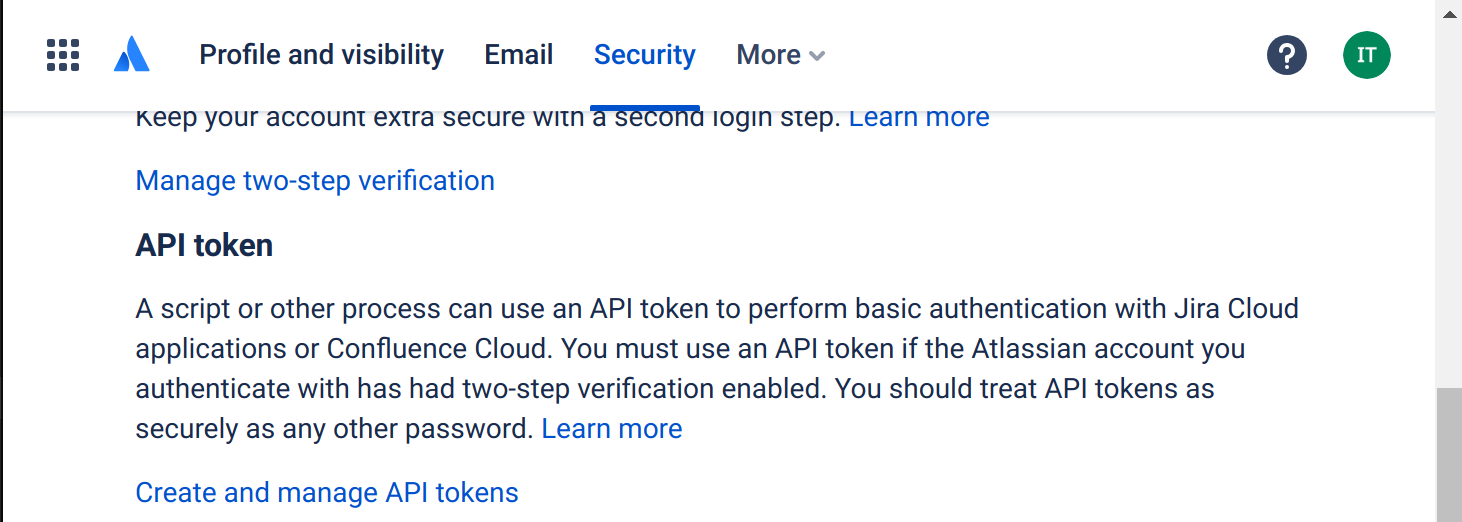
Click on "Security"

-
In the "API token" section, click on "Create and manage API tokens"
-
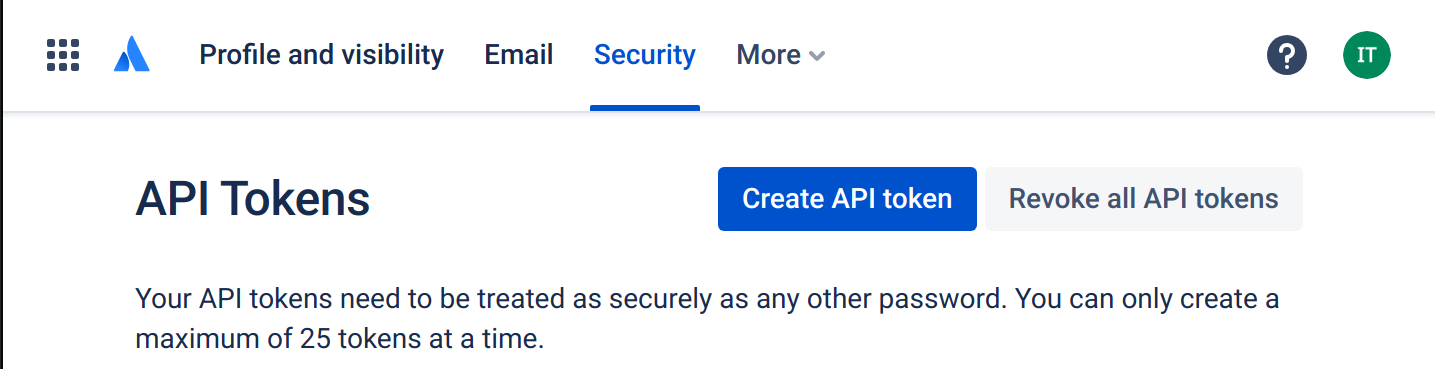
Click on "Create API token"
-
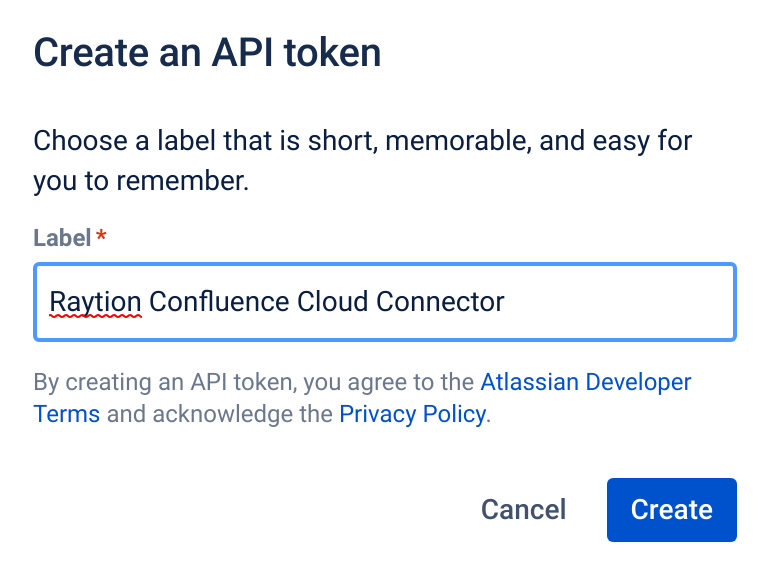
Choose meaningful label and click "Create"
-
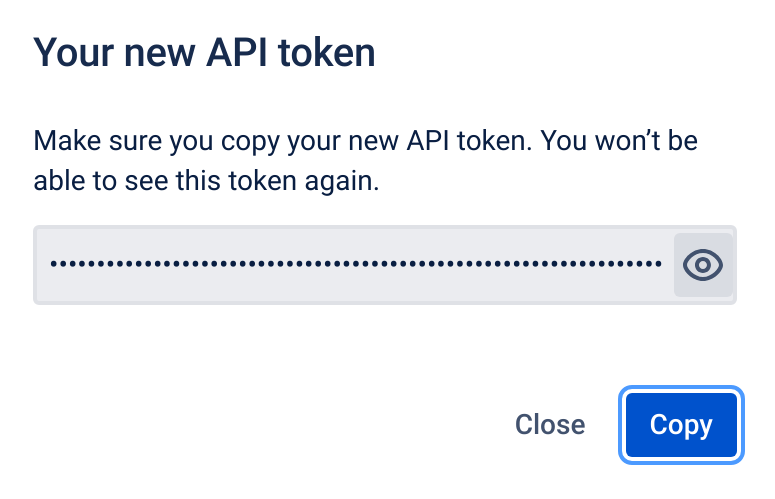
Click on "Copy" or the eye symbol and copy the API token manually. Then click on "Close"
-
Your new API token will show up in the summary table. If exposed, you will also be able to revoke single tokens by clicking "Revoke" on the entry and then confirming once more.

You will need the user email address and the API token for the connector configuration.
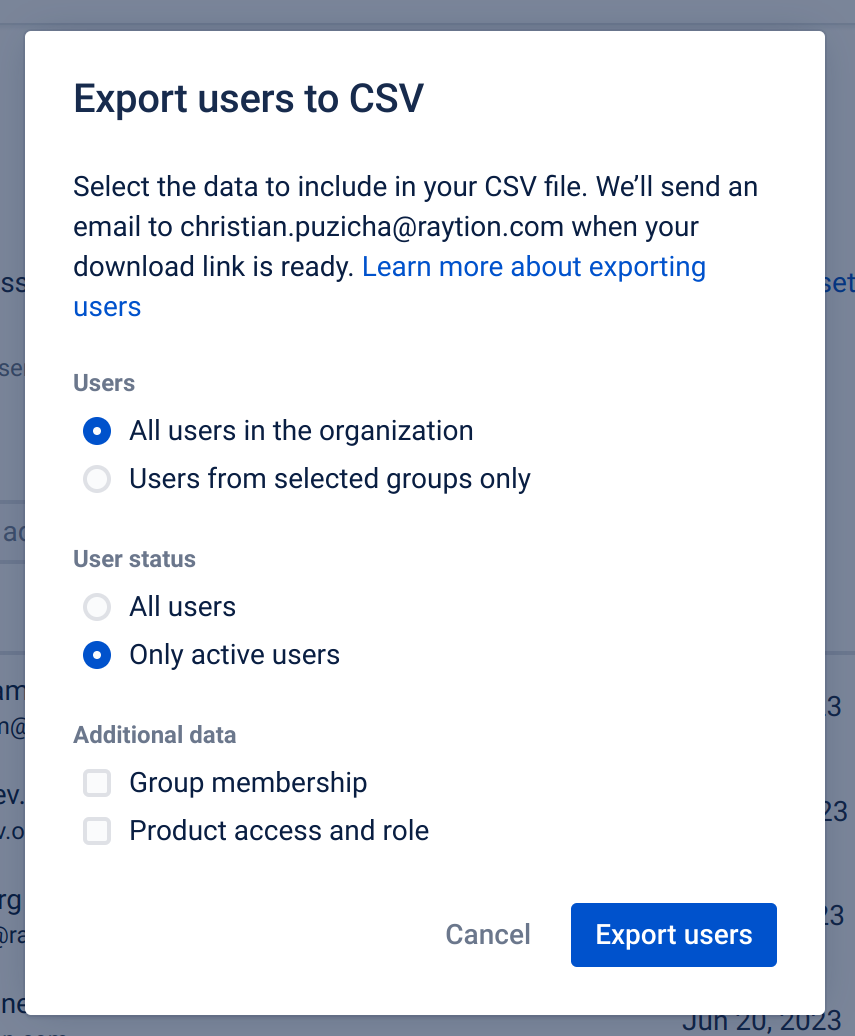
Export Users to CSV
If a user restricts access to their eMail address, the connector cannot use the standard REST API to query it. The user would then lose access to all but public documents. As an alternative, a CSV export that maps user IDs to user emails can be used. Confluence Cloud provides a detailed manual on how to export all users here.
-
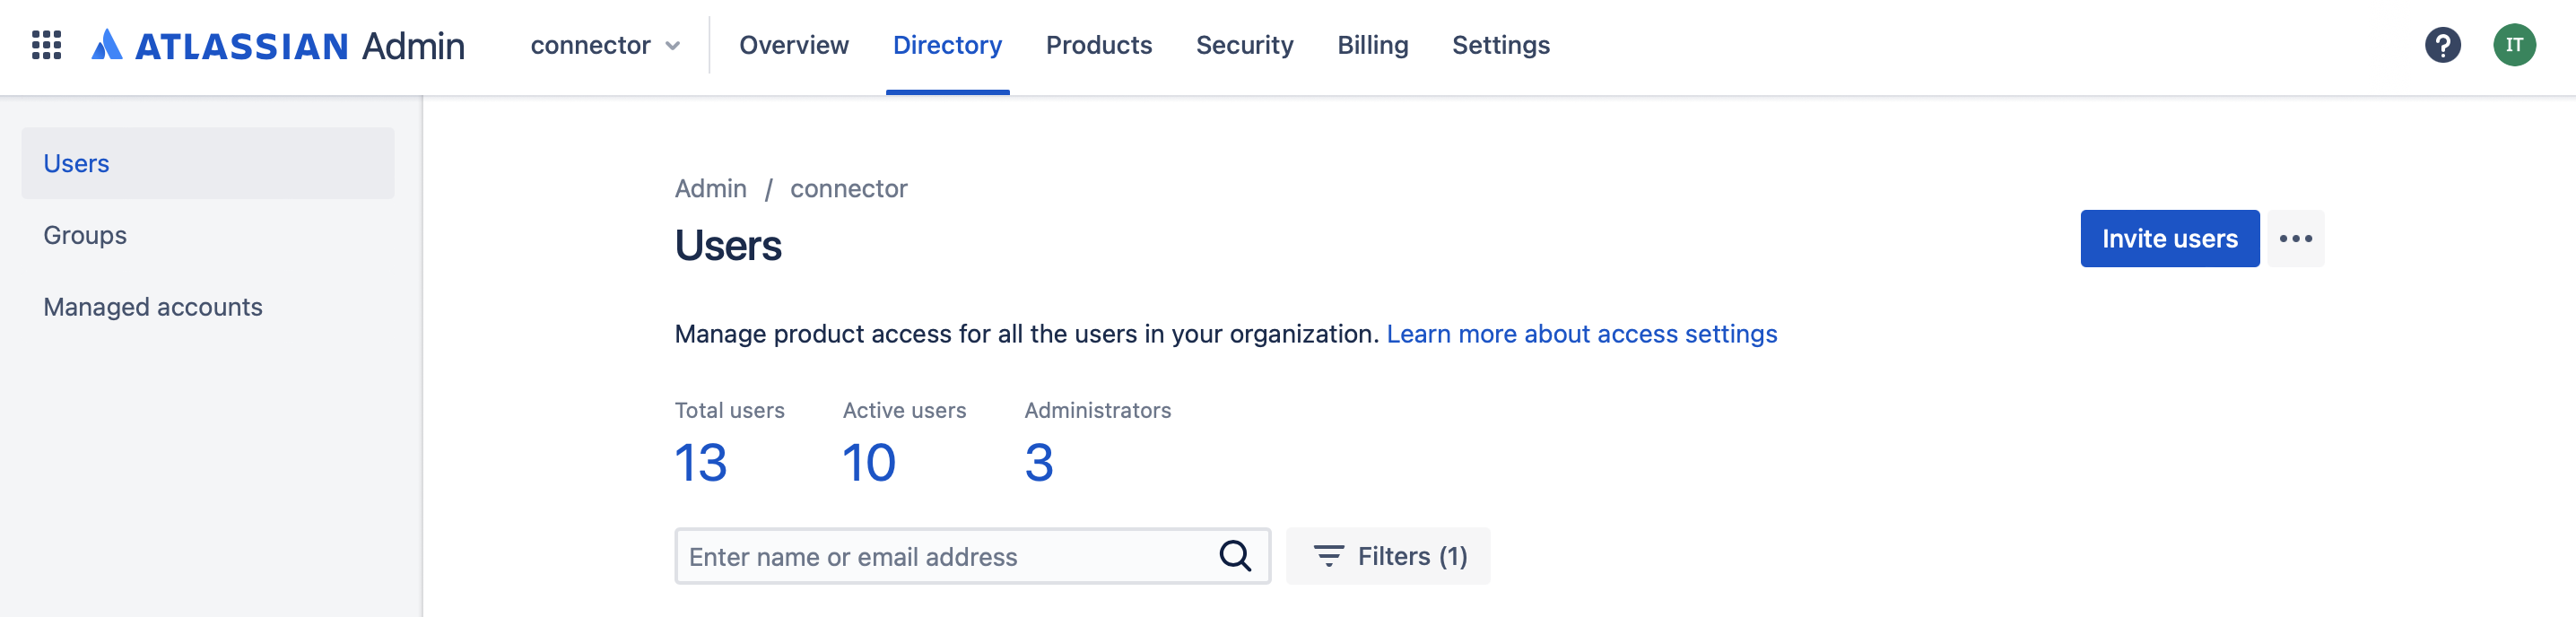
Log into admin.atlassian.com using an account with admin privileges.
-
Click on the middle pane "Directory" and then "Users" on the left.
-
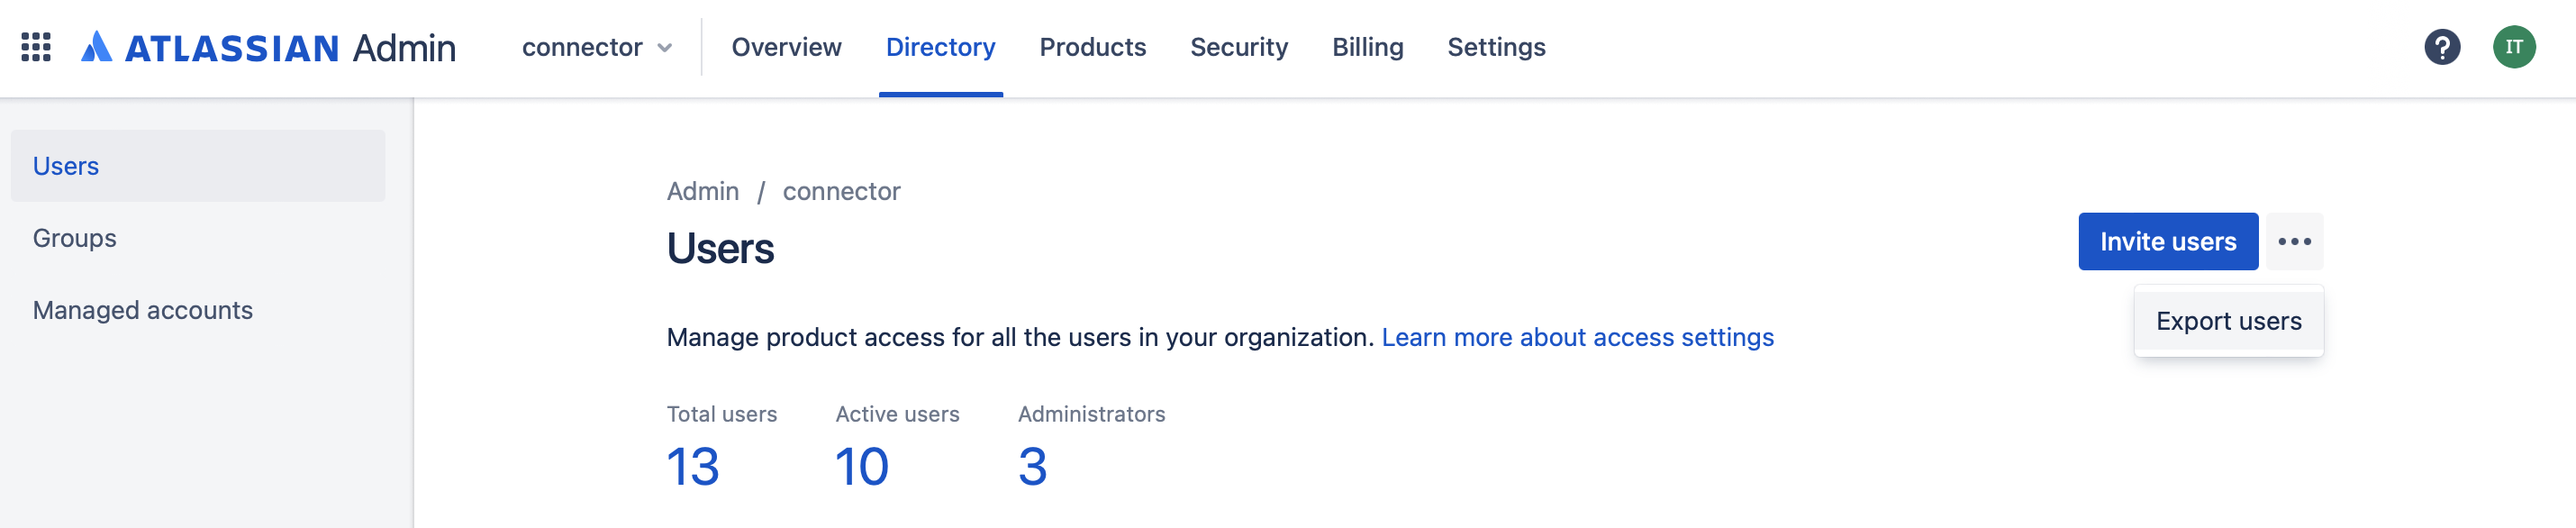
Click on the three dots next to the button "Invite Users". The button "Export users" will appear. Click it.
-
A pop-up will show. Check "All users in the organization" (default) and "Only active users". Do not add additional data. Proceed by clicking the blue button "Export users".
-
An email will be sent to the admin. Open the email and click the download link. Save the .csv file to a location, which can be accessed by the connector.
-
The user .csv file should be updated regularly to capture newly added active users.
The option "Group membership → Pivot to column" should not be selected to avoid having multiple rows per user, as it can negatively affect performance.